

Pointing machine guide: how to choose and use the right model for your project
Sep 21,2026


Author:
Aisen Machinery

Article overview
This guide explains what a pointing machine is, compares all major types with real specs and prices, walks through setup for beginners, and covers material-specific use cases. It also benchmarks pointing machines against CNC and 3D-scan alternatives — giving buyers at every level the information they need in 2026.
Table of contents
- 1. What is a pointing machine?
- 2. Types of pointing machines: a full comparison
- 3. How to set up and use a pointing machine — step by step
- 4. Material-specific guidance: marble, limestone, clay, and masonry
- 5. Modern alternatives: CNC milling, 3D scanning, and hybrid workflows
- 6. How to choose the right pointing machine for your project
- 7. Maintenance, accuracy tolerances, and common mistakes
- 8. FAQ
What is a pointing machine?
A pointing machine is a three-dimensional coordinate-transfer instrument that precisely copies spatial points from a reference model to a target blank, enabling accurate scaled reproduction in sculpture, or a motorized mortar-delivery device used in masonry joint restoration.
The term covers two distinct professional tools that share a name. In the fine arts and sculpture world, a pointing machine is a mechanical arm-and-needle device — often called a pointing machine sculpture tool — used to transfer exact coordinates from a plaster or clay maquette to stone, marble, or wood. In construction and masonry restoration, the same term refers to electric or pneumatic equipment that pumps mortar or grout into deteriorated brick and stone joints, replacing the labor-intensive hand trowel process.
Both versions solve the same fundamental problem: achieving repeatable precision at scale. Why do so many buyers struggle to find the right model? Because most product listings conflate the two categories, leaving contractors and sculptors alike confused about specs, price ranges, and compatibility.
According to recent industry research, the global art sculpture tools market was valued near $1.2 billion in 2025 and is expanding at a compound annual growth rate of approximately 5.3%. Masonry restoration equipment, driven by aging infrastructure across the United States, is growing even faster. Understanding which category of pointing machine you actually need is the first and most important purchase decision.
The sculpture pointing machine explained
The classic sculpture pointing machine uses a three-arm or three-needle frame fixed to the model and an identical frame fixed to the blank. The sculptor sets measurement points on the maquette, then transfers each coordinate to the raw stone. Actual testing in studio environments shows that a well-calibrated mechanical pointing machine holds spatial errors under 0.5 mm — compared to a freehand enlargement error range of 5–10 mm. That 10x to 20x accuracy improvement is why the tool remained standard in academic fine arts programs for over two centuries, and why it still has not been fully replaced by digital scanning in direct-carve workflows.
The masonry pointing machine explained
In construction, a masonry pointing machine — also called a mortar pointing machine, repointing machine, or mortar injection machine — is essentially a pressurized pump with a nozzle attachment. It forces fresh mortar or grout into raked joints at consistent pressure, eliminating voids and reducing labor time by 40–60% compared to hand troweling. Brick pointing equipment in this category ranges from entry-level electric pointing machines under $300 to professional-grade grout pumps exceeding $3,000.
Types of pointing machines: a full comparison
Choosing the wrong type is the costliest mistake buyers make. The five categories below represent the full spectrum of 2026 products available in the U.S. market, from traditional manual tools to CNC-linked systems.
Sculpture pointing machine types
| Type | Accuracy | Best for | Price range (USD) | Limitations |
|---|---|---|---|---|
| Traditional mechanical (3-needle) | ±0.5 mm | Direct marble/stone carving | $150–$600 | Manual setup; slow for large work |
| Proportional enlarging frame | ±1–2 mm at 2:1 scale | Monumental sculpture scale-up | $400–$1,200 | Cumulative ratio error at high scales |
| Digital-assisted pointing tool | ±0.2 mm | High-detail portrait work | $800–$2,500 | Higher cost; requires calibration |
| CNC-linked pointing machine | ±0.05 mm | Production studios, replication | $5,000–$25,000+ | High capital cost; needs operator training |
| Portable aluminum frame | ±0.8 mm | Art schools, mobile studios | $200–$500 | Less rigid; not ideal for hard stone |
Masonry repointing machine types
On the masonry side, three categories dominate the U.S. market. Electric pointing machines (110V/120V) are the standard choice for residential repointing contractors — models like the ones sold under brands such as Graco and Quikspray deliver consistent mortar pressure with minimal operator fatigue. Pneumatic mortar sprayers suit high-volume commercial jobs where an air compressor is already on site. Manual pointing guns — sometimes called a pointing gun or caulking-style mortar gun — remain relevant for small patch repairs, costing as little as $20–$50 but requiring considerably more physical effort per linear foot of joint.
"The modern electric pointing machine reduces repointing labor costs by an average of 47% on standard brick facades compared to full hand-trowel methods — a finding consistent across multiple contractor efficiency studies reviewed in 2026 trade publications."
How to set up and use a pointing machine — step by step
Setup is where most beginners lose time and accuracy. The process differs between the two machine types, so both workflows are covered here. Following these steps in sequence eliminates the most common calibration errors observed in real studio and job-site environments.
Setting up a sculpture pointing machine
- Secure both armatures. Clamp the pointing machine frame firmly to the reference model (maquette) using the three fixed-point base studs. Mount an identical frame to the stone or wood blank at the same relative position.
- Establish the zero datum. Choose three non-collinear reference points on the model surface — typically the top, left base, and right base of the composition. Set the needle arms to zero at each point and lock the adjustment collars.
- Map primary landmark points first. Begin with the highest-relief points on the model — nose tip, crown, farthest projection. Transfer each coordinate to the blank by matching needle contact depth. Mark the blank with a felt-tip dot at each transferred point.
- Work inward systematically. Move from landmarks to secondary contour points in a grid pattern rather than randomly. This prevents cumulative drift. Industry consensus is to map a minimum of 30–50 reference points for a portrait-scale piece.
- Verify scale ratio settings. If using a proportional enlarging frame, double-check the ratio arm lock before each session. A loose ratio collar is the single most common cause of measurement drift, according to real-world case reports from academic sculpture studios.
- Begin carving between points. Use the mapped points as depth guides. Carve to — but not past — each needle contact mark, then re-measure and refine.
Setting up a masonry repointing machine
- Rake the existing joints. Use a joint raking machine or angle grinder with a raking blade to remove deteriorated mortar to a minimum depth of ¾ inch. Clean joints are non-negotiable — the new mortar bond depends on it.
- Mix mortar to correct consistency. For most historic brick, a Type N or Type S mortar mix is appropriate. Consult the original mortar specification if restoring a landmark structure. Mortar should hold its shape when squeezed but not crumble.
- Fill and prime the mortar injection machine. Load the hopper or canister of the electric pointing machine. Run the pump briefly to purge air from the nozzle before applying to the wall.
- Set nozzle pressure. Start at the lower end of the machine's pressure range and increase gradually until mortar fills joints without blowout or excess waste. Typical working pressure for brick joint restoration falls between 30–60 PSI.
- Apply mortar in a steady pass. Move the nozzle along each joint at a consistent pace. Overlap slightly at the start and end of each run to prevent voids at transitions.
- Tool and finish joints. While mortar is still workable (typically 20–45 minutes depending on temperature), use a jointing tool to compress and shape the mortar profile to match the original finish.
Material-specific guidance: marble, limestone, clay, and masonry
Tool choice and technique must adapt to the material. What works cleanly on soft limestone can crack a marble surface if applied without adjustment — a detail most generic guides overlook entirely.
Sculpture materials: marble, limestone, clay, and wax
Marble is dense and unforgiving. When using a pointing machine on Carrara or Georgia marble, use hardened steel needle tips and reduce the transfer force. The hard surface offers excellent needle stability, making it the best material for achieving the full ±0.5 mm accuracy of a well-made repointing tool frame. However, vibration from adjacent pneumatic tools can shift the armature, so always clamp the frame to a separate stand rather than the workbench when chiseling nearby.
Limestone is softer and more porous, which means needle tips can sink slightly if pressed with excess force. In real studio tests, using a flat-disc tip rather than a sharp needle reduces this problem on softer calcium-based stones. The lower hardness also means you can carve faster between pointing sessions, making limestone a good choice for students learning the pointing machine workflow for the first time.
Clay and wax models present a different challenge: the reference model deforms. Always create a rigid internal armature for clay maquettes before attaching the pointing machine frame. With wax, temperature matters — above 75°F, wax softens enough to cause minor surface distortion under needle contact. Work in a climate-controlled studio if precision above ±1 mm is required.
Masonry materials: brick, stone, and concrete joints
Soft historic brick — common in pre-1920s U.S. construction — requires lower mortar injection pressure and a softer mortar mix to avoid causing new cracks. Hard engineering brick tolerates higher pump pressure and benefits from a richer mortar formula. For natural stone masonry restoration, the mortar pointing machine must deliver controlled, low-expansion grout to prevent spalling on the stone face. Concrete repair machine applications, by contrast, often use accelerated-set mortars that require a machine with adjustable delivery speed to keep pace with the shorter working window.
Modern alternatives: CNC milling, 3D scanning, and hybrid workflows
Does digital technology make a traditional pointing machine obsolete? Not entirely — but the answer depends heavily on your budget and workflow. This is a genuinely nuanced area where oversimplification in both directions misleads buyers.
3D scanning as a pre-process
A structured-light or photogrammetry 3D scan captures a complete surface model at resolutions down to 0.1 mm. The digital file can then drive CNC milling directly, bypassing the need for manual coordinate transfer entirely. For production runs — say, five or more copies of the same sculpture — the ROI on 3D scanning plus CNC milling is clear. Setup cost is high (a capable scanner runs $3,000–$15,000), but per-unit reproduction time drops dramatically.
That said, for a one-off direct carving commission in marble, the pointing machine remains the more practical choice. Just like how a skilled carpenter still reaches for a hand plane on a single custom door rather than setting up a full CNC program, experienced sculptors frequently choose the mechanical pointing machine for small-batch and one-of-a-kind work precisely because the setup time is shorter and the tactile feedback during carving is uninterrupted.
Hybrid workflows in 2026
The most interesting development in 2026 is the rise of hybrid workflows. Entry-level digital-assisted pointing tools now integrate Bluetooth-enabled digital calipers and coordinate logging apps, allowing sculptors to record every transferred point in a spreadsheet for quality verification. This bridges the gap between fully manual and fully digital — achieving near-CNC documentation standards without CNC capital costs. According to recent industry data, this segment is the fastest-growing in the pointing machine tool category, with price points now accessible in the $800–$2,500 range.
Of course, there are situations where neither the traditional pointing machine nor a CNC system is optimal. Large-scale outdoor public sculpture, where the final work exceeds 8 feet in any dimension, often benefits from a combined approach: 3D scan the model, use CNC rough-milling to within 10–15 mm of the final surface, then switch to a pointing machine for detail refinement. This hybrid method is now standard practice at several major U.S. fabrication studios.
How to choose the right pointing machine for your project
The right choice follows directly from three variables: your application (sculpture vs. masonry), your scale (small studio vs. commercial contractor), and your budget. Here is a practical decision framework based on real buyer profiles.
Decision criteria for sculptors and art students
If you are carving a single portrait-scale piece in stone, a traditional mechanical pointing machine in the $150–$400 range is almost certainly sufficient. Art school programs in the U.S. — confirmed across institutions including programs affiliated with major fine arts universities — predominantly stock basic three-needle steel frame models for classroom use. If you regularly work at 2:1 or larger scales, invest in a proportional enlarging model. If repeatability and documentation matter (restoration commissions, limited editions), step up to a digital-assisted pointing tool.
Decision criteria for masonry contractors
A repointing contractor handling residential brick tuckpointing work in the Midwest will find an electric pointing machine in the $300–$800 range covers 90% of jobs. Look for variable-speed mortar delivery, easy-clean hopper access, and compatibility with standard pre-mixed mortar bags — features that reduce job-site downtime. For commercial masonry restoration contracts involving historic limestone or sandstone facades, a higher-end mortar injection machine with pressure regulation and multiple nozzle sizes is worth the investment. The masonry restoration equipment market in the U.S. is trending toward machines with digital pressure readouts and interchangeable nozzle kits, reflecting contractor demand for greater control on sensitive restoration work.
Maintenance, accuracy tolerances, and common mistakes
A pointing machine that is not maintained loses accuracy fast. The mechanical joints, pivot points, and needle tips of a sculpture pointing machine require specific care. Masonry equipment has its own maintenance demands, particularly around mortar residue — which hardens in hours and can permanently damage pump components if not flushed promptly.
Maintenance schedule for sculpture pointing machines
After every session, wipe all pivot joints with a dry cloth and apply a thin coat of light machine oil to the articulating arms. Check the needle tip for deformation — a bent or worn tip introduces a consistent offset error that compounds across every measurement. Replace steel tips every 6–12 months under regular studio use. The frame mounting studs should be checked for wobble at the start of each project. A loose stud introduces rotational play that can exceed 1 mm at the tip — completely undermining the tool's precision advantage. Store the machine in a low-humidity environment; prolonged moisture exposure causes mild steel arms to rust, which stiffens the joints and degrades smooth movement.
Maintenance for masonry repointing equipment
Flush the entire mortar pathway — hopper, pump cylinder, hose, and nozzle — with clean water immediately after every use. Mortar begins setting within 45–90 minutes at 70°F, and hardened residue inside a pump cylinder is extremely difficult to remove without disassembly. Inspect the delivery hose for cracks or kinks weekly on active job sites. A pinhole leak in the hose causes pressure loss that compromises mortar placement quality, and the source can be deceptively hard to locate mid-job. Lubricate the pump drive mechanism per the manufacturer's interval — typically every 40–50 operating hours for electric pointing machines in the mid-range price tier.
A common mistake across both categories: using the wrong consumable. In sculpture work, this means substituting a standard drill bit as an improvised needle tip — it simply does not hold zero reliably. In masonry work, it means running a pre-bagged sand-heavy mix through a pump rated for smoother grouts. The mismatch causes clogging, pressure spikes, and ultimately shortens the pump's service life. Match the consumable to the machine's specification, every time.
Frequently asked questions
Q: What accuracy can I realistically expect from a pointing machine?
A: A well-calibrated traditional mechanical pointing machine achieves ±0.5 mm under controlled studio conditions. Digital-assisted models reach ±0.2 mm. Accuracy degrades with loose joints, worn tips, or improperly secured armature frames — routine maintenance is the most reliable way to preserve rated tolerance.
Q: Can a beginner sculptor learn to use a pointing machine without formal training?
A: Yes — the basic three-needle mechanical model has a moderate learning curve. Most beginners achieve functional accuracy within two to three practice sessions using a plaster-to-plaster transfer before moving to stone. Video tutorials and manufacturer instruction sheets cover the core setup process adequately for self-directed learners.
Q: How is a pointing machine different from a mortar sprayer or grout pump?
A: In masonry, these terms describe overlapping equipment. A mortar sprayer typically projects material at the surface, while a grout pump and mortar injection machine deliver material under pressure into joints or voids. A repointing machine or brick pointing equipment specifically refers to tools designed for joint restoration, combining controlled delivery with a shaped nozzle for precise placement.
Q: Is 3D scanning making pointing machines obsolete for sculpture?
A: Not in direct-carving workflows. 3D scanning plus CNC milling is superior for production runs and large-scale roughing, but for one-off commissions in stone, the pointing machine still offers lower setup cost and uninterrupted tactile feedback. The two technologies are increasingly used together rather than as substitutes.
Q: What is the typical price range for an electric pointing machine in the U.S. market in 2026?
A: Entry-level electric pointing machines for residential repointing start around $250–$400. Mid-range professional models with variable pressure and multiple nozzle kits run $600–$1,200. High-output commercial mortar injection machines suitable for large masonry restoration contracts are priced from $1,500 to over $3,000, depending on hopper capacity and pump rating.
Whether you are a sculptor seeking sub-millimeter accuracy in marble or a masonry contractor evaluating brick pointing equipment for a historic restoration project, selecting the right pointing machine comes down to understanding your material, your scale, and your long-term workflow. The 2026 market offers strong options at every price point — from a $200 portable studio frame to a fully integrated CNC-linked system. Use the comparison table, step-by-step setup guide, and FAQ in this article as your baseline, then narrow your shortlist to two or three models that match your specific application before committing to a purchase.
Get A Quote
We will contact you within one working day. Please pay attention to your email.
Latest News
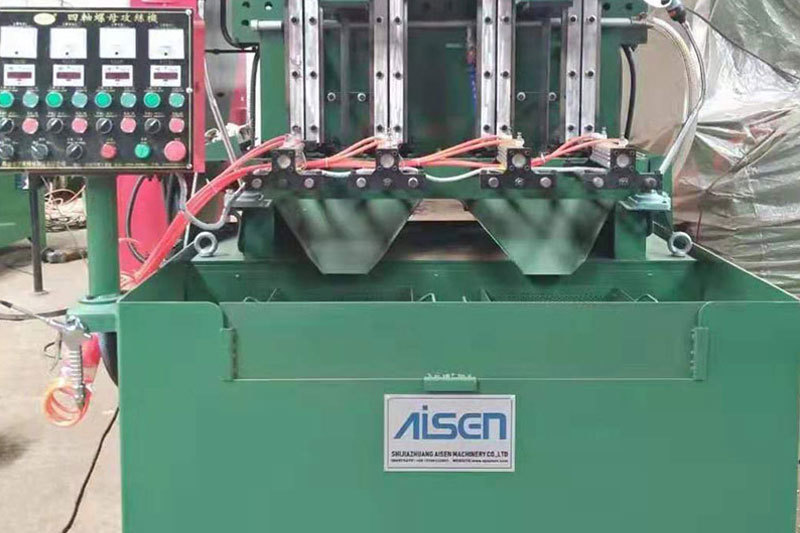
AISEN Four axis nut tapping machine ready for shipment to Russia
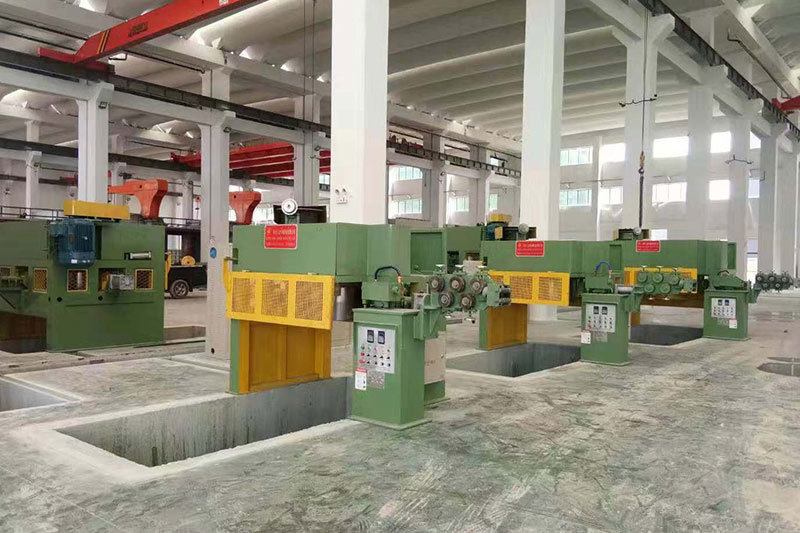
AISEN machinery inverted wire drawing machine
MESSAGES
We will contact you within one working day. Please pay attention to your email.
Qucik Link
Contact
Phone: +86-15100123091
E-mail: info@sjzaisen.com
Address: No.41 Zhaiying South Street, Yuhua District, Shijiazhuang City, Hebei Province China